Showing posts with label Ubuntu. Show all posts

Saturday, January 26, 2013

Setting up an RDF server in VirtualBox, part 2

This is the second part of a two-part (maybe N-part?) series about setting up an RDF server in a VirtualBox instance with the Ubuntu 12.04 server distribution. In this part, I'll set up Mediawiki as a place to conveniently edit RDF/Turtle documents.

You might be thinking, what about Semantic Mediawiki? Doesn't this already exist? My experience with SMW was disappointing. The source syntax for creating links is pretty straightforward, and the silly naming scheme for importing external ontologies doesn't seem too bad. But when you want to do any real work with external ontologies, it gets difficult. After a few days of hacking around I couldn't find a way to say that a predicate defined in my SMW instance was owl:sameAs some predicate defined externally. At that point, I decided to strike out on my own.

The results of that effort are on GitHub at https://github.com/wware/stuff/tree/master/semantic-wiki. The setup script is to be run in the VirtualBox instance after the Ubuntu 12.04 server installation (with LAMP and SSH servers enabled) has completed.

This is a work in progress. When I've got it beaten into presentable shape, I'll put it up at http://willware.net with more explanatory material.

Sunday, November 18, 2012

Setting up an RDF server in VirtualBox, part 1

VirtualBox is an open-source virtual machine that you can use on Windows, Mac OSX, or Linux to run one of the other operating systems. Here I'll be using VBox on an Ubuntu Linux desktop machine to set up an Ubuntu server machine. The point in doing that when the two operating systems are so similar is to keep the two environments separate, and to discover what I'll need when I move the server to a VPS.

I'm doing this on a laptop with a 160 gig partition with Ubuntu 10.04 desktop. I can comfortably dedicate 20 gig to the virtual hard disk image. The VM will run Ubuntu 12.04 server. No shared folders because they won't be available on the VPS.

Make sure you have a good fast Internet connection for the Ubuntu desktop machine, and download the Ubuntu server ISO. It's available as 32-bit or 64-bit. If you're not sure about your CPU, you're probably better off with 32-bit. Set up VirtualBox:
$ sudo apt-get install virtualbox-ose

Now you'll find "VirtualBox OSE" in the Applications->Accessories menu in the upper left of the screen. Click on that, and when the window comes up, click on the light blue "New" icon. Pick a machine name, and Linux/Ubuntu as the virtual machine type, and give yourself a decent amount of RAM and hard disk space. It's nice to start the hard drive with 20 or 30 gig if you can spare it. Once the VM is created, go into settings for it, click "Storage" and click the third line with the CDROM icon. To the right of "CD/DVD device" click the yellow folder icon and navigate to the Ubuntu server ISO that you downloaded earlier. Set "Network" to the "Bridged adapter" option. Under shared folders, add your home directory (read only) and give it a name you'll remember. Now it's time to start the VM and install Ubuntu server on the virtual hard disk you've created. Before I could do this on my laptop, I found I needed to go into Settings->System->CPU and enable PAE.

During the installation process, you'll be asked what kinds of servers you want to run. Select "OpenSSH server" (so you can ssh/scp into the VM) and "LAMP server" (to get Apache and MySQL) and "Tomcat Java server" (to pick up a bunch of Java stuff you'll want for Jena). If you select an empty password for the root user on MySQL, you'll need to enter it multiple times, so you may want to select something almost as trivial like "root". You don't need to worry too much about security with a VM that will only be reachable on the local subnet.

When the installation is done, the machine will reboot, and the VM window will close and re-open. Go to the "Devices" menu at the top and under "CD/DVD devices", unclick the Ubuntu server ISO.

On to Jena. Looks like there is some good advice here, but some of it is dated so I'm tweaking it a bit: http://ricroberts.com/articles/installing-jena-and-joseki-on-os-x-or-linux

Log into the virtual machine and type:
$ sudo su -
# chmod 777 /opt
# exit
$ cd /opt
$ wget http://www.apache.org/dist/jena/binaries/apache-jena-2.7.4.tar.gz
$ wget http://www.apache.org/dist/jena/binaries/jena-fuseki-0.2.5-distribution.tar.gz
$ for x in *.gz; do tar xfz $x; done
$ rm *gz               
$ mv apache-jena-2.7.4 apache-jena
$ mv jena-fuseki-0.2.5 jena-fuseki
$ chmod u+x jena-fuseki/s-*

Add these lines to your .bashrc:
export FUSEKIROOT="/opt/jena-fuseki"
export JENAROOT="/opt/apache-jena"
export PATH="$FUSEKIROOT:$PATH"
export CLASSPATH=".:$JENAROOT/lib/*.jar:$FUSEKIROOT/*.jar"

You'll want to copy some client-side Ruby scripts from the server's Fuseki directory to your host machine. My VM is at 192.168.2.7, so on the host machine I typed:
$ scp 192.168.2.7:/opt/jena-fuseki/s-* .
I also needed to install Ruby on the host machine.

Now you can start up the Fuseki server and load it with some data. The docs for Fuseki are here. On the server:
$ cd /opt/jena-fuseki
$ ./fuseki-server --update --mem /dataset

This starts an empty database of RDF triples. This database is in-memory and non-persistent, and will vanish when you control-C. Back on the host machine, you can enter some data into the database:
$ ./s-put http://192.168.2.7:3030/dataset/data default family.rdf
$ ./s-put http://192.168.2.7:3030/dataset/data default wares.rdf

This is a small semantic graph talking about who in my family is married and whose kids are whose. To  make sure the data was actually stored, we can query it.
$ ./s-get http://192.168.2.7:3030/dataset/data default

This prints out the entire database in Turtle, an update of N3. Or we can get the same thing in JSON:
./s-query --service http://192.168.2.7:3030/dataset/query 'SELECT * {?s ?p ?o}'

I can see that I don't have the time and energy to get everything done in one sitting that I hoped I would accomplish. So this is part 1, and a part 2 will follow later, and I'll make sure they include links to each other.

Thursday, October 25, 2012

Setting up Ubuntu 12.04

My Linux distribution of preference is Ubuntu. Debian did a nice job on the package manger and Canonical did a nice job making it user-friendly. But some things in 12.04 desktop version, I don't need, like the Unity interface. So here's what I like to do to make 12.04 a little friendlier. This is particularly worthwhile when running in VirtualBox, a necessity because my employer is a Fedora shop, and it's a big hassle to run Node.js on Fedora, which I need to run JSHint to sanity-check our Javascript code.

I'm starting with a 40 gig disk image and for networking, a bridged adapter, so that when I run the server on the Ubuntu instance it will be accessible on the rest of the subnet. So first let's get rid of that silly Unity interface. Open a terminal window and run:

$ sudo apt-get install gnome-panel

Close the terminal window and log out. On the login screen, to the right of your name, you'll see a circular logo. Click on that to get a menu and select "GNOME Classic". Type in your password, and notice your blood pressure gently lowering as the familiar old Ubuntu desktop appears before you.

Assuming you're on a virtual machine, you'll really want to stop the screen locking up and requiring your password. So click on the gear in the upper right and select "System Settings", then select "Brightness and Lock". Toggle the "Lock" switch to "OFF" and uncheck the box "Require my password when waking from suspend". Dismiss that window.

Now install Node.js, JSHint, and a few other conveniences.

$ sudo su -
# apt-get install python-software-properties
# add-apt-repository ppa:chris-lea/node.js
# # You'll need to hit the Enter key to continue...
# apt-get update
# apt-get install nodejs npm
# npm install jshint -g
# apt-get install vim git gitk emacs subversion meld
# apt-get install apache2 mysql-server mysql-client pphp5 libapache2-mod-php5
# ^D
$

I like to package up my .ssh directory into a tarball and bring it to new machines when I set them up. Having stored my id_dsa.pub key in the .ssh/authorized_keys file on the Subversion server, I don't get constantly bothered to supply a password for every Subversion operation.

By all means set up a shared folder with your host machine. I map the host machine's /home/wware directory to a directory in /media. I need to be root to access it but it's still the easiest way to move things back and forth.

Friday, September 28, 2012

Fun with the Raspberry Pi

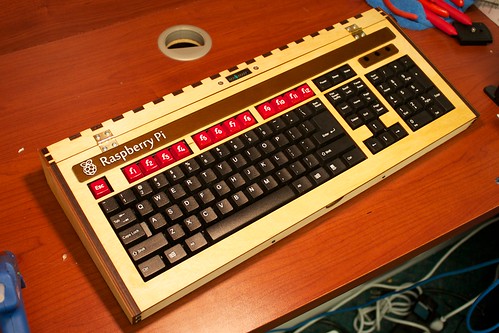
If you've heard about the Raspberry Pi, (wikipedia, elinux.org) a $35 single-board Linux computer, you probably won't learn much new here. The main point of this post is that I got mine to boot, so I do have one or two small bits of advice to pass on to those working toward that goal. First, photographic evidence (veracity: if I were faking it I wouldn't put a big reflected flash in the middle of the screen).

Here's the board booting. Booting (and everything else) is a little slower on the Raspberry Pi than you're probably accustomed to. But then, hey, it's $35, and you can stuff it into whatever piece of hardware you're building and have full-blown Linux with X Windows. So live with it.

My experience has been that at least in the near future, it's not really $35. Here's what happens: the Raspberry Pi folks build a bunch of boards and sell them for $35, but they get picked up by people who want to resell them, so you end up getting yours on eBay for somewhere in the $55 to $70 range. Eventually this mischief will end and the price will stabilize.

 Photographic evidence number two: the board has booted into X Windows. This is using the recommended-for-beginners Debian-based distribution, 2012-09-18-wheezy-raspbian.zip, which unpacks into 2012-09-18-wheezy-raspbian.img, and obviously the date in that name will be updated periodically.

So here are the tips for fellow beginners:
  • First, remember this board is designed for complete novices, and even, heaven help us, artists. Do not despair, you ARE smart enough to get it working.
  • The Raspberry Pi folks warn you away from micro-SD cards, but the one I'm using works fine.
  • You may find that your keyboard is mapped in a funny way. My (@) key and (") key were swapped, and the (#) key was mapped to a British pound sign (£). One solution to this appears here. Mine was to create the file /home/pi/.xsessionrc which contained this line:
setkbmap us -option grp:ctrl_shift_toggle

A better approach to the keyboard issue is one of the options in raspi-config (the first thing that appears on your screen after all those boot messages finish). Look for "keyboard configuration" and select the canonical U.S. keyboard choices.

Everything else seems to be working, but I haven't tried to do much yet. I have no idea how to talk to GPIOs or other peripherals yet, but I've done that with other Linux boards and expect that my past experience will get me there pretty painlessly. That, and there is a HUGE community for this thing.

Looking forward to checking out Adafruit's WebIDE when time permits. The development system runs as a web server on the board, and you develop in the browser on your laptop over a network connection.


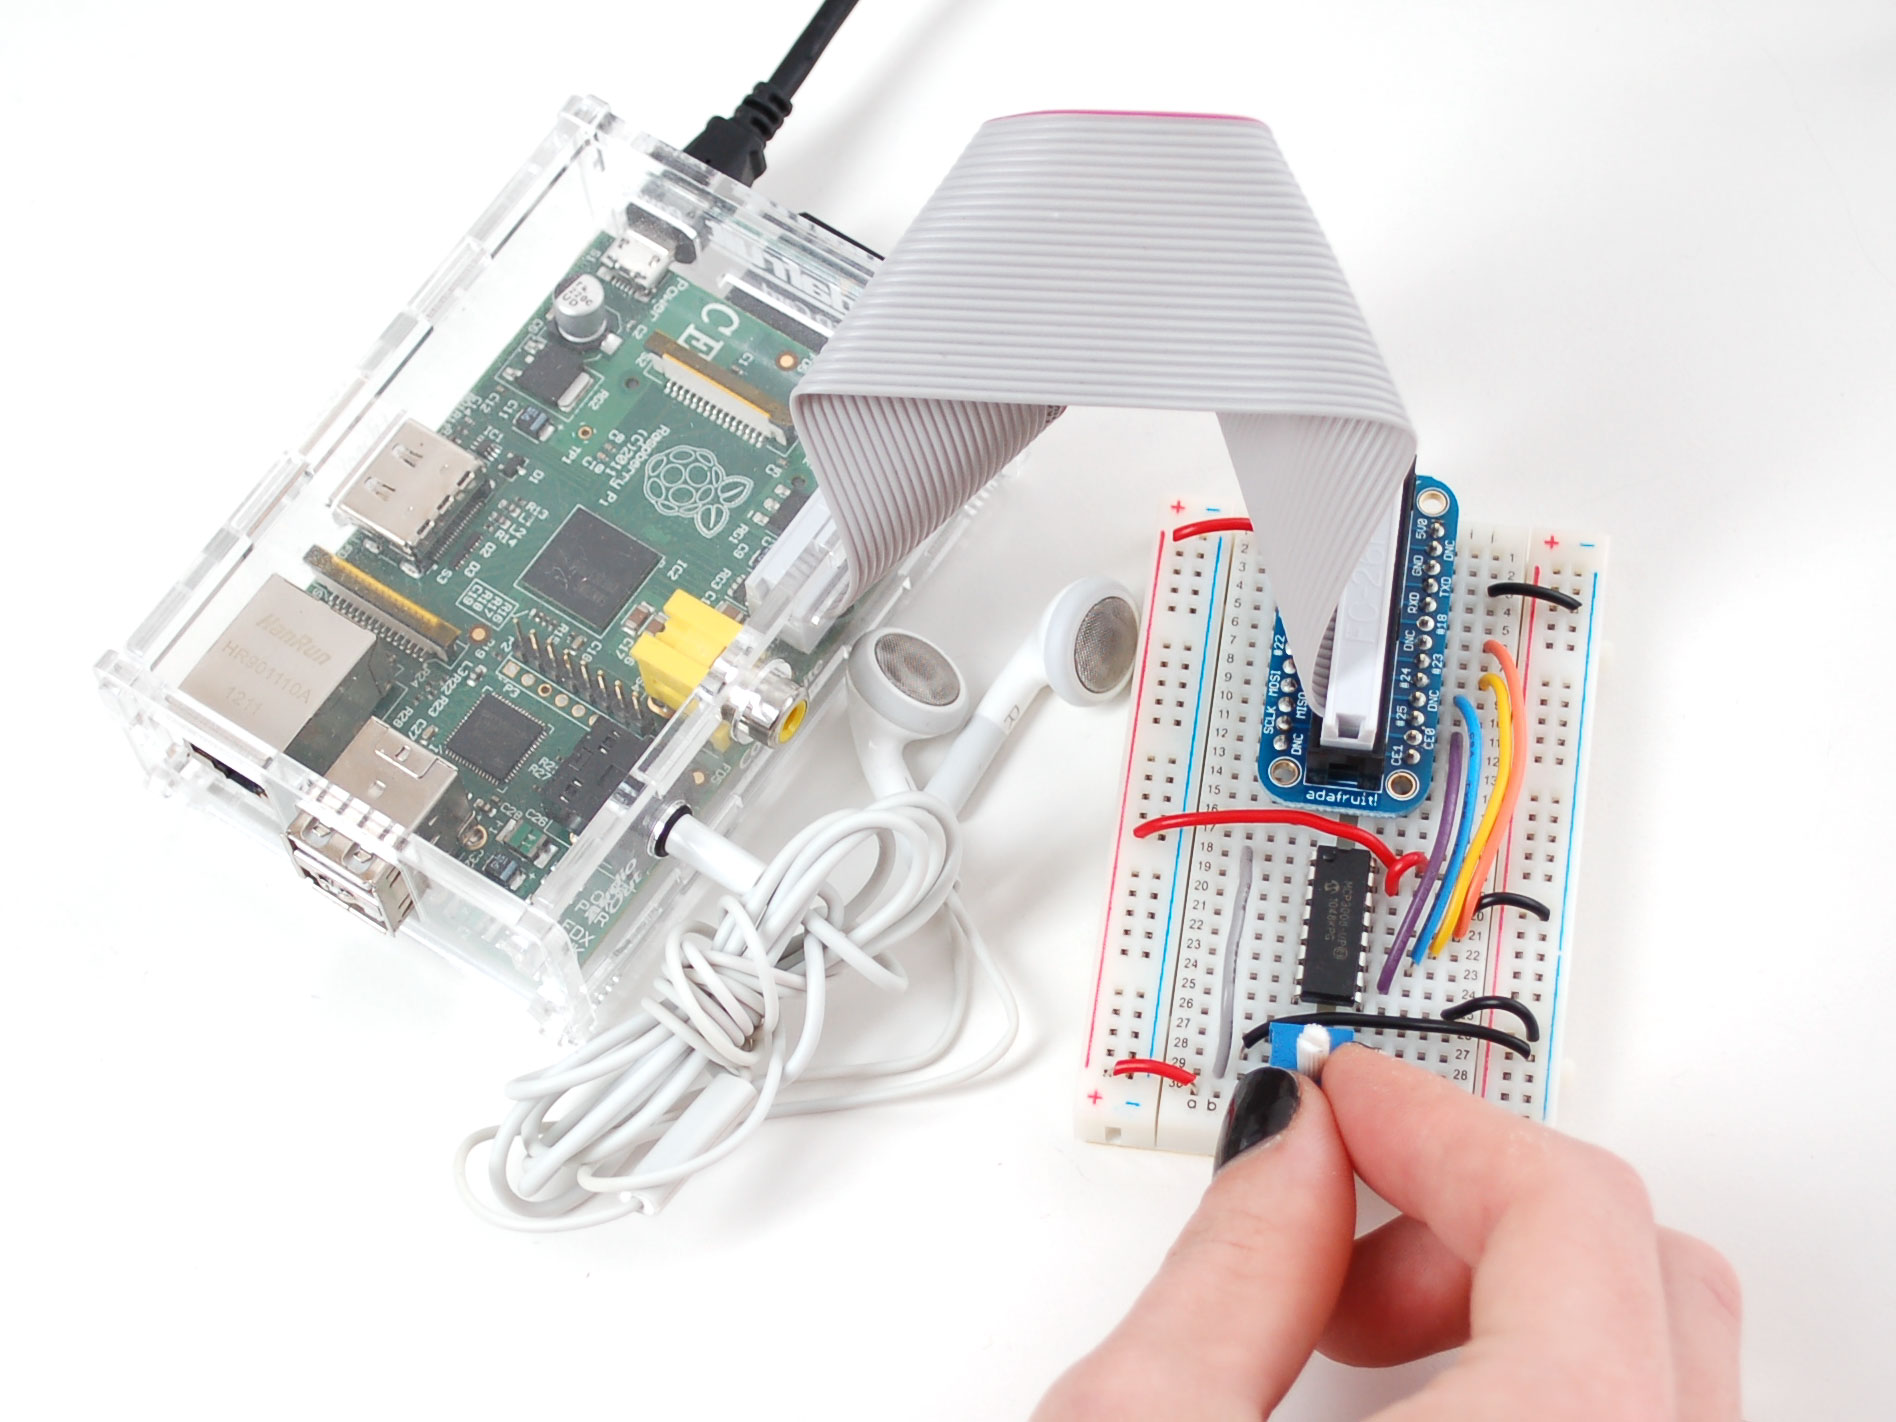
And now for your viewing pleasure, assorted Raspberry Pi pr0n:
 

Tuesday, December 21, 2010

Developing for the AT91SAM7 microcontroller

I once purchased a SAM7 P256 board from Sparkfun for $72. This post is a bunch of pointers to the resources I’ll need to develop for it. The same code will work on the H64 header board (only $35), which can be used in future USB projects. UPDATE: Sparkfun no longer sells the H64 header board, but they have a H256 board for $45.

This post assumes an Ubuntu Linux environment.
Set up the development environment.
Use Sam_I_Am to access the SAM-BA bootloader.
Some easily available demos and example programs
Other resources

Saturday, November 06, 2010

Remastering Ubuntu Mini Remix

Ubuntu Mini Remix is a very small, very efficient Ubuntu distribution created by Fabrizio Balliano. I discovered it when I needed to create a kiosk-like boot disk image that booted the user directly into a simple command-line application. I didn't need X Windows, OpenOffice, web access, or email, I just needed to run my application, and UMR was perfect for that. The baseline UMR image is about 165 MB, and is available for i386 and for amd64.

In my previous blog post, I explained how to create a debian package. Since then I've written a shell script that takes one or more debian packages and uses them to remaster UMR. If you wanted to use the debian package from the last blog post to update UMR, you could simply type:
(cd ../make-debian-pkg/; make)
./customize.sh \
    ../make-debian-pkg/foo-bar_1.0_i386.deb
If you have multiple debian packages to be included, simply add them as additional command line arguments. The result will be a file called "customized-umr-10.10-i386.iso", located in your home directory.

For very small additions, a package may be overkill. It might make better sense to edit the script to simply add the files you need, and in my situation at work, that was the approach I ultimately chose. But if your change is more substantial, and especially if you want to include other packages that you'll rely upon, you'll want to think about using package management.

If you want your boot image to take the user directly into your application as I did, you can go into the chroot jail and replace the file /etc/skel/.bashrc with a short script that calls your application. The command would look like this:
sudo cp my-bashrc ${CHROOT_JAIL}/etc/skel/.bashrc
and you'd want to put that with the lines where the comment says "Prepare to chroot", near line 63. (Take the line number with a grain of salt as I may end up editing it at some point.)

Tuesday, November 02, 2010

Making a debian release package

I've been doing a lot with Ubuntu Linux lately, and decided it was time to find out how to put together a debian package. Ubuntu shares Debian's package management system, having descended from Debian. I've banged my way through the code so you don't have to. Here I will just discuss a few highlights. There isn't that much to it. Since this is just an example, I didn't get very creative with the name or the contents. Running make will build foo-bar_1.0_i386.deb.

First a quick look at the files.
./Makefile
./control
./copyright
./postinst
./prerm
./usr/bin/say-hello
./usr/lib/python2.6/foobar.py
./usr/share/doc/foo-bar/foobar.txt
The three files in the "usr" directory tree will be copied into the target system when you say "dpkg -i foo-bar_1.0_i386.deb". If you then say "dpkg -r foo-bar", those three files will be removed. The postinst and prerm scripts can be used to perform actions after installation and before removal respectively, but here they just print messages to the console. The real meat is in the two files control and Makefile. control specifies the package name, version number, dependencies, and other information. Makefile takes pieces of that information to build makefile variables that will be used in creating the package. There isn't a heck of a lot to say about the process other than there is a special DEBIAN directory with meta-information about the package and how it should be installed and removed.

This is the minimal possible example. You can build a deb file this way and install it on an Ubuntu machine. But there are a lot of things that could be improved and cleaned up, and put in better compliance with common practices for making these packages more maintainable. The two big areas are (1) there are recommendations about additional fields to go into control, and (2) there is a tool called lintian, a sort of lint command for deb packages, whose advice should be applied. When I build this package, the advice I get is the following:
E: foo-bar: changelog-file-missing-in-native-package
W: foo-bar: third-party-package-in-python-dir usr/lib/python2.6/foobar.py
W: foo-bar: binary-without-manpage usr/bin/say-hello
W: foo-bar: maintainer-script-ignores-errors postinst
W: foo-bar: maintainer-script-ignores-errors prerm
where "E" and "W" are "Error" and "Warning". So that's not too bad.

Thursday, October 28, 2010

Customized Ubuntu distributions part three

Apparently most of the stuff in my previous posting was the wrong approach. I think I've finally got what I want. All this time, I've been trying to figure out how to do a live Linux CD that (a) includes some code we've been developing at work, and (b) boots very quickly and simply to where the user can use that code. The goal is to provide software tools to a partner company where everybody's laptop runs Windows, but all our stuff is written in Linux.

First I tried to build our code in Cygwin using the Windows version of libusb. I found that fraught with complexities of all sorts and eventually decided the Live CD approach sounded a lot easier. Besides, we wanted the Live CD/bootable USB stick anyway for some later plans.

Theoretically there are small Linux distributions (the most famous being Damn Small Linux) that can be used for this sort of thing. As soon as I started getting into that, I found that DSL is no longer maintained, the documentation for it is insufficient and the pieces that do exist contradict one another. I struggled to resolve dependency and version issues in porting our code to DSL and finally gave up. By that time, I had already discovered how to make an Ubuntu Live CD, and so I delivered one with the first piece of our code to our partner.

But I really wanted a much shorter boot time. I don't need X Windows or networking or OpenOffice or a web browser. I'd prefer to have a development environment on there in case the code required modification but even that is unnecessary.

In the past several days I've tinkered with about a dozen Linux distributions claiming to be "small" and found them all deficient in one way or another. I've tried dozens and dozens of permutations of dumb little tricks involving VirtualBox and QEMU and Ubuntu Customization Kit and burning CD-Rs and USB sticks. I've looked at what feels like hundreds of different web pages and blog postings, each claiming to have an authoritative and trustworthy solution to my problem. Each involves failures to account for discrepancies between versions, or the document I've found is old and inapplicable to what I'm doing, or the author made several minor assumptions that don't work in my environment.

Currently I'm looking at something called Ununtu Mini Remix which looks promising. It's looking very good so far, as I am remastering it with the information on the Ubuntu help website. Adding a shell script to /bin to make sure I can, and adding an "echo HELLO" to /etc/skel/.bashrc to make sure it appears when the disk boots into a bash session.

Everything was going great and then mksquashfs got hung up on the proc directory -- AH, this happened because when you finish a chroot session you must do three umounts (dev/pts, proc, sys) even if you weren't aware of having mounted them. Apparently chroot mounts them without telling you. Umount those in the chroot environment, exit, then umount edit/dev, and the mksquashfs goes just dandy.

So my two dumb tricks in /bin and /etc/skel/.bashrc worked like a champ in VirtualBox and now I'm going to try to make a bootable USB stick. Ubuntu's Startup Disk Creator likes the file (it's very picky about what ISO files are considered bootable) and the USB stick works great in my Windows laptop. Now we make the Angry Birds WHEEEE noise, however dumb some people might find the game. The next step is to make my tweaks into a Deb file using this HOWTO so they go in painlessly.

Grazie mille to Fabrizio Balliano for creating Ubuntu Mini Remix.


165MB Ubuntu livecd containing only the minimal Ubuntu package set. Wonderful as a rescue disk or as a base for Ubuntu derivative creation.

Saturday, October 23, 2010

Customized Ubuntu distributions part two

Turns out I was mostly still spinning my wheels here -- move on to part three of this tale for the solution to the problem.

After a brief visit to the world of Damn Small Linux and subsequent narrow escape from eternal damnation, I returned to Ubuntu with the idea of reducing the size (not as big a priority as I initially thought), speeding up the boot time, and running a program when the user logs into X.

First a quick note about the 9.10/10.04 UCK thing. What's working well for me is to run UCK on a box that has 10.04 installed, and apply it to a 9.10 ISO. Do not attempt to run UCK inside a VMware instance, it's just a lot of pain. You can run the resulting ISO in QEMU but don't forget the "-boot d" argument.

To shrink the distro, I removed OpenOffice, Ubuntu Docs, and Evolution. Things I added included autoconf, emacs, git, guile, and openssh-server.

The low-hanging fruit for speeding up boot time is to bring up networking as a background process, described here. Doing this in Ubuntu 9.10 means editing /etc/init.d/networking, adding "&" here:
case "$1" in
start)
        /lib/init/upstart-job networking start &
        ;;
People have given a lot of thought to other approaches to speed up Ubuntu's boot time, and maybe I'll blog more about that as I investigate it further. I really need to dig deeper into the boot time topic. It will likely warrant another blog post.

Having an app start immediately when the user logs in is somewhat interesting. The X session startup stuff is all in /etc/X11/Xsession.d/ and the main thing here is /etc/X11/Xsession.d/40x11-common_xsessionrc where we find a call to the user's ".xsessionrc" file. The user's directory is populated from /etc/skel, so the trick here is to create /etc/skel/.xsessionrc:
export LC_ALL=C
${HOME}/hello.sh &
where hello.sh is a sample shell script just to make sure I've got the principle down pat:
#!/bin/sh
sleep 2   # wait for other xinit stuff to finish
xterm -geometry 120x50+0+0 -e "echo HELLO WORLD; sleep 5"

Hmm... that worked for a bit, then stopped working. I've since discovered another file, /etc/gdm/PreSession/Default, which seems more relevant. But that starts the app just a little too early, before the user is actually logged into the X session, so maybe I should put a time delay in my app? Annoying.

Monday, October 18, 2010

Fun with customized Ubuntu distributions

At work we have an interesting problem. We are working with some companies in Taiwan. Obviously there's a language difference, but there is another difference as well. We are an Ubuntu Linux shop, and they all have Windows laptops. Periodically we have bits of test code that they need to use, and the OS gulf needs to be overcome.

My first whack at this issue was to try to use Cygwin to rebuild our tools from source on a Windows platform. But after I'd spent a few days dealing with libusb, and making not a whole lot of progress, a co-worker suggested a bootable USB stick. The Taiwanese folks get to keep their Windows laptops, but with a quick reboot they can temporarily use Linux machines just like ours. So I set about learning the art of bootable USB sticks, which in Ubuntu 9.10 is pretty painless. (This is not the case with Ubuntu 10.04. If you need to do this, stick with 9.10.)

Not to keep you in suspense, the two magical things are
  • Ubuntu Customization Kit, (sudo apt-get install uck) which produces an ISO file suitable for burning a CD or DVD which you can boot from, and
  • USB Startup Disk Creator (already present in your System>Administration menu) which puts that ISO file onto a USB stick and makes the stick bootable.
These are amazingly easy-to-use tools, given the complexity of what they're doing. In the bad old days, the Knoppix distribution existed solely for the purpose of rendering this feat possible for mortals. That said, I learned a few tricks about these things which I'll pass along here. Do NOT use Ubuntu 10.04, as there is a serious bug in that version of UCK plus a handful of annoying behavioral oddities. These are fixed in a future UCK release, but that's not available in the Ubuntu 10.04 repositories. In order to produce a USB stick which could be used with a Windows laptop to produce another bootable USB stick, I put a copy of the ISO file onto the USB stick. The instructions for copying the USB stick then go like this.
  • Boot into Windows and insert the first USB stick. Copy the ISO file somewhere memorable. Restart the laptop.
  • Boot into Ubuntu using the USB stick. Once you're booted, insert the second USB stick.
  • Bring up USB Startup Disk Creator. The original ISO file on the first USB stick (from which you are now running) will not be visible in the file system. But the Windows hard drive will be readable, so dig around in it to find the ISO file copy you just used. Use that as the source, and select the 2nd USB stick as the destination. Push the button.
  • Once that installation is complete, copy the ISO file from the Windows hard drive onto the second USB stick. Voila, a copy.
Using the first part (making an ISO image) I was able to produce a DVD with some of our tools for the Taiwanese folks to use. I set up Traditional Chinese and English as languages, with the default to boot into Traditional Chinese. But then because it had some of our source code, I encrypted this entire 725 MB file, which is ironic given that Ubuntu is open source. But there had to be a way to encrypt only the proprietary stuff.

On the next boot image I send them (which will be a USB stick, not a DVD, since USB sticks are oh so much sexier), the contents of the stick will be open source, and the proprietary stuff will be pulled down from a little tarball on some handy little server. The thing that pulls down the tarball and handles security is my little tarball runner script. The new ISO is at http://willware.net/tbr-disk.iso, and if you need to share some closed-source Linux code with people in China or Taiwan, feel free to use it.

To use this bit of cleverness, build some code on your Linux box, package it up as a tarball (including a run.sh shell script at the root level, in case you need to do installation stuff), and if necessary, encrypt it using (my tweaked version of) the Twofish algorithm found on Sourceforge. Then post it to the Internet and email the password only to your intended recipients.

If I find the time and energy, I'll package up the tarball runner and the Twofish module as a Deb package to make the installation painless.