People have been asking for an overview of the 3D printer that I showed at Makerfaire NYC 2014. I designed it myself, borrowing a couple of ideas from other printers. My printer builds objects from a liquid resin that solidifies under ultraviolet light. Your dentist may use similar stuff to fill cavities. I get the ultraviolet light from an unmodified conference room projector that cost me about $350, the single biggest expense of the whole project. The most important design principle was that a person of very low craftsmanship like myself should be able to build the thing. It pretty much does not require precision at any point in the construction. There is a Github repository for all this stuff, including a DIY slicer.
The idea to use a projector rather than steering a laser came from the B9 Creator printer. The Peachy printer gave me the idea of floating resin on salt water and projecting the light onto the surface of the liquid. The idea to raise and lower the build platform using three threaded rods driven by a bicycle chain was my own, and it turned out not to be such a great idea.
Soon I plan to post some of my plans for a 2015 printer. Right off the top of my head I can think of four worthwhile goals.
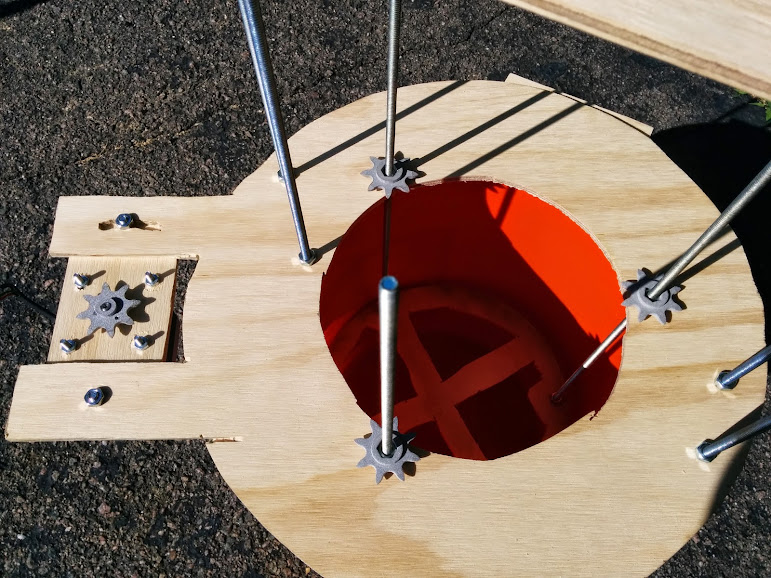
 With the bicycle chain not yet in place, the printer looks like this. Those gray sprockets engage the bicycle chain, which goes around in a sort of diamond shape. The orange bucket is one of the three-dollar buckets from Home Depot. The plywood, nuts and bolts, and threaded rods also came from Home Depot. At this particular point in the work, I thought I would suspend a mirror over the top of the bucket at 45 degrees, which is why you see a piece of wood in the upper right of the photo. But I didn't know about first surface mirrors then, and I lost enough UV going through the glass twice that I couldn't get the resin to solidify, so I then positioned the projector directly over the bucket, pointing downward.
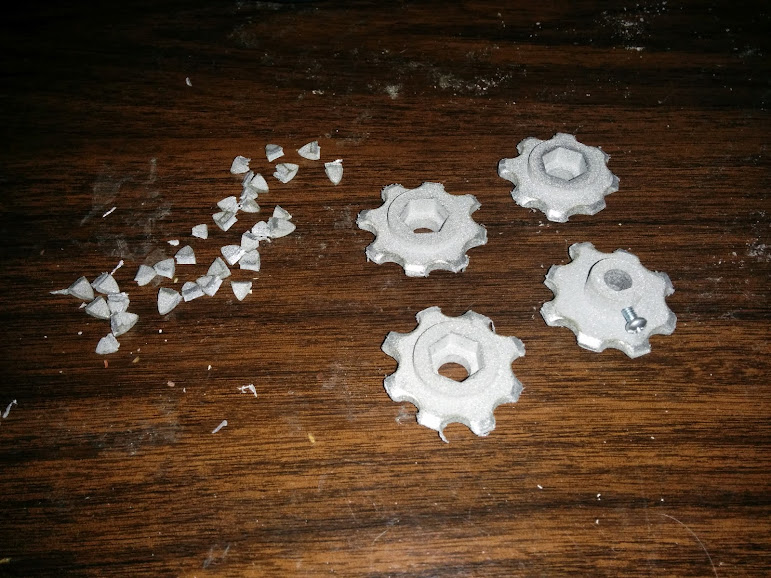
The sprockets were designed using OpenSCAD and initially the teeth were too pointy - correct in theory but too sticky for real-world bicycle chain, so you can see where I cut off the points, and later revised the design. If you order sprockets from my Shapeways store, they should now work fine.
Here is the printer fully assembled. The bicycle chain is driven by a stepper motor. Each revolution of the stepper motor (200 steps) raises or lowers the build platform by 1/20th of an inch because the thread on the threaded rods is 1/4-20.
When it's printing, it looks like this. Only where the light is the strongest is the resin solidified. The resin happily ignores ambient diffuse daylight in the room where I'm printing, so I don't need to use dark room lighting.
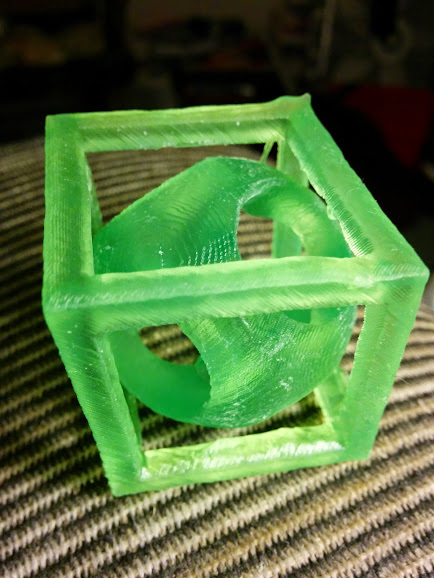
Pictured below are some of the objects I've printed with the thing. I started out with a bottle of green resin and when that started getting low, I added a bottle of clear, so my things tend to vary between green and clear.
Previous blog posts discussing this printer in its earlier stages
The idea to use a projector rather than steering a laser came from the B9 Creator printer. The Peachy printer gave me the idea of floating resin on salt water and projecting the light onto the surface of the liquid. The idea to raise and lower the build platform using three threaded rods driven by a bicycle chain was my own, and it turned out not to be such a great idea.
Soon I plan to post some of my plans for a 2015 printer. Right off the top of my head I can think of four worthwhile goals.
- Bring it to both the Bay Area Makerfaire and the NYC Makerfaire.
- Replace the bicycle chain and those three threaded rods with something simpler and more reliable. The obvious candidate is GT2 belts such as are sold by Adafruit.
- Clean up the electronics and software so I don't need a laptop to control it.
- Replace the orange bucket with something with transparent sides, like an aquarium tank, so that people can watch the printing process.
 With the bicycle chain not yet in place, the printer looks like this. Those gray sprockets engage the bicycle chain, which goes around in a sort of diamond shape. The orange bucket is one of the three-dollar buckets from Home Depot. The plywood, nuts and bolts, and threaded rods also came from Home Depot. At this particular point in the work, I thought I would suspend a mirror over the top of the bucket at 45 degrees, which is why you see a piece of wood in the upper right of the photo. But I didn't know about first surface mirrors then, and I lost enough UV going through the glass twice that I couldn't get the resin to solidify, so I then positioned the projector directly over the bucket, pointing downward.
The sprockets were designed using OpenSCAD and initially the teeth were too pointy - correct in theory but too sticky for real-world bicycle chain, so you can see where I cut off the points, and later revised the design. If you order sprockets from my Shapeways store, they should now work fine.
Here is the printer fully assembled. The bicycle chain is driven by a stepper motor. Each revolution of the stepper motor (200 steps) raises or lowers the build platform by 1/20th of an inch because the thread on the threaded rods is 1/4-20.
When it's printing, it looks like this. Only where the light is the strongest is the resin solidified. The resin happily ignores ambient diffuse daylight in the room where I'm printing, so I don't need to use dark room lighting.
Pictured below are some of the objects I've printed with the thing. I started out with a bottle of green resin and when that started getting low, I added a bottle of clear, so my things tend to vary between green and clear.
- The very first prototype
- Initial 3D cad sketch, cost breakdown, ideas (not all of them workable)
- Moving from last-cut wooden gears to bicycle chain
- Bicycle chain details, particularly 3d printed sprocket design
- Final development work and first few really terrible prints
- A couple much better prints (also shown here)


