Showing posts with label getting started. Show all posts

Wednesday, July 09, 2014

Cleaning up the SLA printer design

The stereolithographic printer described in my last post works, but it has a lot of room for improvement. Two obvious improvements are to use a stepper motor to raise and lower the build platform, allowing for automated operation, and to accept standard input files such as the STL file format.

In this post, I'd like to look at improvements in the overall mechanical design, specifically intended to make this printer easy for other people to build. I envision this as a printer that could be easily and affordably built by an after-school club, at a price of less than $600. The projector I used cost me $350 and I'll assume that's the same price for others. Likewise I expect others would pay about $75 for a couple of bottles of UV-cured resin. That leaves $75 for everything else. You have a stepper motor, a stepper control board, and a Raspberry Pi. I have a little wiggle room left for laser-cut plywood, and a 5-gallon bucket from Home Depot. I get my laser-cutting done at danger!awesome in Cambridge, MA. The bucket is bright orange, and that's the color I've used in this design, where the plywood is yellow and green (the green pieces having gear teeth that mesh). The pale blue stick-things are 1/4-20 threaded rods, cheaply available at Home Depot. The brighter blue thing is the stepper motor. The three green gears surrounding the threaded rods have captive nuts, allowing the stepper to raise and lower the threaded rods in lock-step. I'm kind of pleased with this design and I think this is what I'd like to show at Maker Faire NYC this year.
 

Looking down into the bucket, we can see one more circular piece of plywood which is the build platform. When we raise the three threaded rods high enough, the build platform comes up out of the bucket, which holds a layer of resin floating atop a salt water bath (a trick I borrowed from the Peachy Printer). And in fact, you could use this setup with a Peachy Printer rather than a projector, and you'd save money by doing so.

These gorgeous pictures are courtesy of Tinkercad.com. It's a pretty wonderful thing if you're doing 3D design. One last picture, showing the projector bouncing light off the mirror to illuminate the resin.
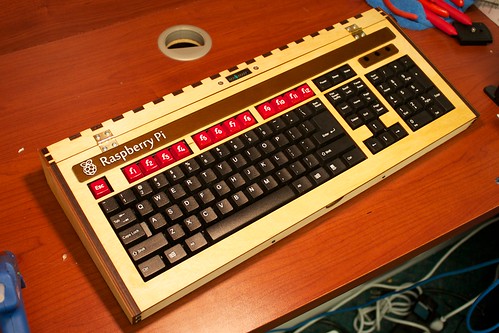

Friday, October 05, 2012

Blogging from a Raspberry Pi board

I've plugged an Ethernet cable into the Raspberry Pi and brought up the Midori web browser (which I had previously never heard of). As a web-browsing experience, the RPi is extremely slow, but it works. Google's new authentication scheme is a little dubious about Midori, not too surprising. But it rendered Facebook readably and I was able to look at some of my pictures on Flickr.

I intend to find some interesting hardware hack for the board, probably a musical instrument of some sort. Of course it won't be running X Windows at that point. If I get ambitious I might try to figure out how to create a stripped-down X-less Raspian distribution. I've done a little bit of distro hacking on Ubuntu in the past.

Even without X, I'm concerned about performance issues. Linux is not normally used for real-time use, but apparently I'm not the first person to wonder if that's feasible. Well I think I've exhausted my patience here.

Back on a normal computer. That was interesting, but enough is enough. Any RPi hacking that reaches a state of readiness for public consumption will be posted on Github, and notifications will appear here.

Before I forget, one handy note to other Yanks thrown by Raspian's curious keyboard mapping. You might have skipped over most of the options in raspi-config as I did (the first thing that appears on your screen after all those boot messages finish). Look for "keyboard configuration" and look for the canonical U.S. keyboard choices.
Here's a custom search engine for Raspberry Pi stuff, courtesy of Google.

Friday, September 28, 2012

Fun with the Raspberry Pi

If you've heard about the Raspberry Pi, (wikipedia, elinux.org) a $35 single-board Linux computer, you probably won't learn much new here. The main point of this post is that I got mine to boot, so I do have one or two small bits of advice to pass on to those working toward that goal. First, photographic evidence (veracity: if I were faking it I wouldn't put a big reflected flash in the middle of the screen).

Here's the board booting. Booting (and everything else) is a little slower on the Raspberry Pi than you're probably accustomed to. But then, hey, it's $35, and you can stuff it into whatever piece of hardware you're building and have full-blown Linux with X Windows. So live with it.

My experience has been that at least in the near future, it's not really $35. Here's what happens: the Raspberry Pi folks build a bunch of boards and sell them for $35, but they get picked up by people who want to resell them, so you end up getting yours on eBay for somewhere in the $55 to $70 range. Eventually this mischief will end and the price will stabilize.

 Photographic evidence number two: the board has booted into X Windows. This is using the recommended-for-beginners Debian-based distribution, 2012-09-18-wheezy-raspbian.zip, which unpacks into 2012-09-18-wheezy-raspbian.img, and obviously the date in that name will be updated periodically.

So here are the tips for fellow beginners:
  • First, remember this board is designed for complete novices, and even, heaven help us, artists. Do not despair, you ARE smart enough to get it working.
  • The Raspberry Pi folks warn you away from micro-SD cards, but the one I'm using works fine.
  • You may find that your keyboard is mapped in a funny way. My (@) key and (") key were swapped, and the (#) key was mapped to a British pound sign (£). One solution to this appears here. Mine was to create the file /home/pi/.xsessionrc which contained this line:
setkbmap us -option grp:ctrl_shift_toggle

A better approach to the keyboard issue is one of the options in raspi-config (the first thing that appears on your screen after all those boot messages finish). Look for "keyboard configuration" and select the canonical U.S. keyboard choices.

Everything else seems to be working, but I haven't tried to do much yet. I have no idea how to talk to GPIOs or other peripherals yet, but I've done that with other Linux boards and expect that my past experience will get me there pretty painlessly. That, and there is a HUGE community for this thing.

Looking forward to checking out Adafruit's WebIDE when time permits. The development system runs as a web server on the board, and you develop in the browser on your laptop over a network connection.


And now for your viewing pleasure, assorted Raspberry Pi pr0n:
 

Sunday, September 11, 2011

We need to build more educational computers

When I was a kid, I had this absolutely wonderful educational computer called Digi-Comp. It was very simple, with only three bits of state, and that was fine for learning an awful lot of basic stuff about computers. And it was sturdy as anything. I must have disassembled and reassembled it hundreds of times and it never broke and never stopped working. Somebody needs to design a 21st century mechanical computer using an inexpensive service like Ponoko or Shapeways or 100kGarages or Big Blue Saw to do laser cutting or 3D printing.

When I was in college, I saved up money to buy a KIM-1 single-board computer with a 6502 microprocessor, a hexadecimal keypad, and six seven-segment digit displays. I learned a lot of what became my career playing with that thing, writing little assembly language programs, soldering TTL chips to it, and generally having a great time. When I left school, I bought an old ASR-33 teletype from the school's department for retiring obsolete junk, and used it to give the KIM-1 a 300 baud line printer. Back in those days we had extraordinarily low thresholds of entertainment. Still, it was educational.

We need to be building more of this kind of stuff today. The things we build need to be easily hackable and easy to form user communities around. I guess you could say we already have something like the KIM-1 with today's Arduino, but it never fills me with intrigue like the KIM-1 did, where you were literally typing in machine opcodes onto that hex keypad, and they're showing up in the LED digits. It gives you a real sense of intimacy with the entire process of computation. Compiling C code never gets you quite that close to the action.

If you regard the Digi-Comp and the KIM-1 as two points along a spectrum of sophistication, we probably ought to plan on a third more advanced point, given that the KIM-1 is about 30 years old now. I've been doing some puttering with ARM-7 and ARM-9 boards of various kinds, some so capable as to run Linux, and I think that's a good third point because that's the kind of hardware that appears in modern consumer devices.

Tuesday, December 21, 2010

Developing for the AT91SAM7 microcontroller

I once purchased a SAM7 P256 board from Sparkfun for $72. This post is a bunch of pointers to the resources I’ll need to develop for it. The same code will work on the H64 header board (only $35), which can be used in future USB projects. UPDATE: Sparkfun no longer sells the H64 header board, but they have a H256 board for $45.

This post assumes an Ubuntu Linux environment.
Set up the development environment.
Use Sam_I_Am to access the SAM-BA bootloader.
Some easily available demos and example programs
Other resources

Tuesday, August 12, 2008

Multimachine

Multimachine, built by Pat Delany of Palestine, Texas, is an inspiring project. It is...
a humanitarian, open source machine tool project for developing countries... The MultiMachine all-purpose machine tool can be built by a semi-skilled mechanic with just common hand tools. For machine construction, electricity can be replaced with "elbow grease" and the necessary material can come from discarded vehicle parts. What can the MultiMachine be used for in developing countries?
AGRICULTURE...
WATER SUPPLIES...
FOOD SUPPLIES: Building steel-rolling-and-bending machines for making fuel efficient cook stoves and other cooking equipment...
TRANSPORTATION...
EDUCATION...
JOB CREATION...
The project is open source and thoroughly documented. It uses commonly available pieces. It seeks explicitly to address the needs of the developing world. It recognizes the work people did in this area (1, 2) in years past. Cool stuff. We have all kinds of Industrial Revolution era mill buildings in the greater Boston area and this would fit right in.

Frostbot, the work of Brian Schmalz, is another food fabber. It's designed to frost cookies. The CNC mechanism is from Fireball CNC. Brian's other tinkerings include a cool USB bit-whacking board available at Sparkfun.

Wednesday, July 02, 2008

Penny wise, pound foolish

I got the idea that I should try to design and build my own electronics. I've done electronics design before, including microcontrollers and FPGAs and the like, but I have little experience with power electronics. That, and I'm impatient. The upshot is that after wasting about three weeks and a few hundred dollars in trying to control stepper motors, I'm not much further ahead. Here is the affordable pre-packaged solution (which had been recommended by the guy who sold me the mechanics) which I should have used from the start:
So I'll plan to pick up a 3-axis controller and run it with LinuxCNC. Apparently TurboCNC is also very popular but I'm not about to run DOS on any machine that could be running Linux.

The mechanics cost about $300 including shipping. The steppers cost $75 (I got them from RRRF). This stepper controller will run maybe $225 with shipping, so the whole thing is $600. That's reasonable. Obviously it doesn't include waste.

I'm thinking it would be fun to fool with Python code that generates G code and sends it to the CNC. I could develop a repertoire of programmatically defined shapes.

Friday, June 06, 2008

RepRap replicates, and Will gets a New Toy

On the left is Adrian Bowyer, the University of Bath professor who started the RepRap project. On the right is Vik Olliver, the most active RepRap builder on the planet. The two machines marked "parent" and "child" are RepRap 3D printers with the interesting relationship that the "child" was mostly built by the "parent". This is a HUGE STEP toward Bowyer's vision wherein RepRaps make more RepRaps and humans benefit. This will do for physical goods what the GPL and Linux and Apache have done for software.

My own news is, at least locally, equally exciting. My CNC mill has finally arrived! And I also got an Arduino controller. I've got my stepper motors from RRRF, and a Harbor Freight router is on the way. It's going to take time to put everything together, and of course there's very little spare time in the life of a modern adult.

Once the CNC mill is up and running, I plan to work on a scheme for swapping out the router and swapping in an extruder for thermoplastic. By that time the RepRap guys will be doing even better than they're doing today, so I will benefit from their stuff. Maybe I'll end up making an actual RepRap before I'm through.

Wednesday, May 07, 2008

Affordable CNC gadgets

CNC has existed as a hobbyist pursuit much longer than 3D printers have been. I finally broke down and purchased one of these on eBay. It will take a couple weeks to arrive, and the one I got did not include stepper motors, couplers, or motor drive electronics. Those are things I'd enjoy doing myself anyway, so no problem.

I like this project which is along similar lines.

For my own gadget, I need to order stepper motors, think about couplers, and start planning how the electronics will go together. I'm thinking about being lazy and using the parallel port.

Sunday, March 02, 2008

Coming soon: a complete RepRap kit

BitsFromBytes.com is an on-line store based in the UK which will be offering a complete set of parts for the RepRap for UK£299, or somewhere around US$600 given current exchange rates. They will offer both hardware and software.

I wish I could claim to be so ambitious that I would take a more active approach than simply ordering all the parts in a kit. But I'm as lazy and tired as the next guy, so a kit is really the only practical way I'm likely to do this. And the price is just about right. Months ago, Adrian Bowyer was talking about $400 as a target price for the long term, after lots of self-replicating machines had brought the price of parts down to a minimum. To get so close to the long-term price so quickly is fantastic.

With this kind of head start, the scenario where RepRaps bootstrap themselves to microeconomic ubiquity looks very plausible.

Wednesday, February 27, 2008

RepRap parts available via Ponoko

Ponoko is a very cool on-line laser cutter fabrication service with a wide range of available materials. The idea is that you create a EPS file for the laser cutter to follow, specify the material, and they cut out the pieces and ship them to you. The laser can also engrave lines on the material. EPS files can be generated with Adobe Illustrator or various other similar 2D artwork programs. If you want to make a 3D project (like this table), you make it out of 2D pieces that fit together with slots and grooves. When you upload your EPS file and choice of materials, they figure out how much the laser cutting fee will cost.

Toby Borland (of SMARTlab in the U.K.) has designed a set of laser-cut plywood RepRap parts and made the EPS files available on the Ponoko website. There is a Flickr photo set showing laser-cut RepRap parts and the process of assembling them; I am not sure that's the same Ponoko files and process, or another laser-cutting effort, but it gives you a sense of what's involved, and the level of complexity.

Friday, February 15, 2008

An XYZ platform for fabbing or CNC

I was watching an auction for a CNC XYZ table on eBay that went for $300, item number 200198037915. I would have bid on it if the Z travel hadn't been only 2 inches. It was built from plans from hobbycnc.com and didn't have stepper motors or the machining tool but was otherwise complete. I felt lust in my heart, but that itty bitty Z travel bugged me, so I thought about what could be done to increase it. Here's my general idea.


My hope is that the blue-hatched stage can be made to take either a Dremel tool for CNC milling, or an extruder for fabbing. The result might or might not be self-replicative in a RepRap sense but it would be a cool toy.

Thursday, February 07, 2008

Tommelise project

Tommelise is Forrest Higg's attempt to build his own RepRap-like gadget before RepRap itself is ready for wide distribution. He has spoken at an O'Reilly conference about the RepRap project and he has some fascinating ideas about architecture and how fabbers might relate to it. The recent (early Feb 2008) postings in his Tommelise blog describe his success in connecting stepper motor axles to threaded rods, something I had been wondering about myself.

In the Tommelise FAQ, Higgs mentions Linux and Java (which have been adopted by the RepRap project) as presenting a steep learning curve to people without a software background, citing Microsoft Windows and Visual Basic as more user-friendly alternatives. My own early experiences with Linux required enormous patience. Higgs writes Tommelise has been created for people who aren't particularly clever and may be living in modest circumstances. Any open-source "fabber revolution" (1, 2, 3) will be an empty exercise if it fails to serve such people. Then again, if a genuinely open-source revolution is to occur, we'll eventually need to wean ourselves from Microsoft and make our own tools equally user-friendly.

Tuesday, January 29, 2008

How does one get started?

How does one start to build one's own fabber? RepRap and Fab@Home both offer instructions. There is of course the caveat that the technology is new and experimental and bleeding-edge, so it's not a shrink-wrapped thing where you simply tear open the packaging and start using it. My goal in this posting is mostly to decide whether it makes sense for me to start work on a fabber. My early conclusion is that I'd like the field to mature a little bit more, but it might be fun to tinker with just the 3-axis motion part (check out the video), probably using this microcontroller board.

The RepRap folks have a page about constructing their version 1.0 fabber, called "Darwin". They recommend that you join the RepRap Research Foundation, which supports new fabber builders, and you can purchase parts from their on-line store.

Fab@Home has a Getting Started page with links to their catalog and the list of materials that you can fab with. A pre-assembled Fab@Home fabber will set you back about $3600 plus shipping, currently with a 6-to-8 week lead time, so I guess people are buying them. The Fab@Home is an impressive thing, and good looking.

Hobbyist fabbers today look the way Linux did in 1993. In five or ten years fabbers will be much more common and much more polished, but the people tinkering today will have 99% of the fun. Linux in 1993 was not at all user friendly, everything needed to be hand-tweaked, and you needed to understand a lot of it to use any of it, and the same was true with cars in 1910, and with fabbers now.